In the style of samples I started earlier this week, I have designed a new piece for the production company that I can keep on hand for the shop.
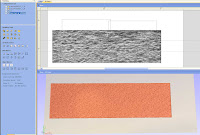
I thought I would make a rusty, beat up metal panel with some interesting components. I started by opening an image of a textured loam wall and converting it to a component.
I then drew a rectangle and cleared everything ouside it. Next was to duplicate that panel so I would have 2 of them.
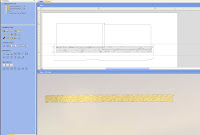
I also thought a riveted rail across the bottom would look interesting, so I drew a top and bottom line the height and length of my new rail. Then I drew what the cross section would look like. Using the 2 rail sweep feature, this was done in three easy clicks.
I thought a straight extrusion looked kinda dull after it was made, so I drew 2 new vertical lines at each end of my newly created rail, and drew a wavy cross section. Again I used the 2 rail sweep. Adding this new shape to my first boring rail gives me a whole new shape.
Now to get it all textured, I just turned on the very first textured loam wall shape I had hiding, added my rail I created and now its all textured! A quickly drawn outline around my rail, clearing the texture OUTSIDE my outline, and I've got my exact shape in the texture I need.
Now for the rivet heads. As in the picture, I just drew a circle the diameter of the heads I wanted, and used the create shape tool to make it a dome. All I needed to do then was to draw a line from the centre of that rivet head to where I wanted the last one to be placed. I copied the object along the line vector, set my number of heads and that's it! Simple stuff. And by ADDING the dome component, it automatically takes on the texture surface of the model your adding it to. If I had just merged it, it would have no texture, as it would behave like an independant surface.
Tomorrows post should wrap up the software end of this sample, then on to painting it!
JO


No comments:
Post a Comment