I thought that one of the panels should have a curve to it, it would be a little more interesting than just a flat panel. Back to the very important 2 rail sweep function. Just like always, we need 2 drive "rails" and 1 cross section that we want to drive down the "rails" You can see in the picture below, the pink dotted lines I will use to create the new component and its results.
Once that shape was complete, I just selected the vector outline of the textured panel I created earlier. Hit the "clear area outside vectors" and now my original panel shape has the new curved surface!
I also decided a perfect rectangle panel was a little boring, so I adjusted the rectangle borders to make them all wavy. It would have been easier to just draw them this way in the beginning, but Aspire is so flexible and quick, you can manipulate the individual parts at anytime. This keeps the creativity flowing by allowing you to design by the seat of your pants.
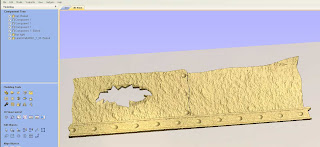
I also liked the idea of having more rivets looking like they were holding the seams together. Instead of drawing new vector outlines and adding a dome shape, I just select 1 rivet from the rail, and copied it 3 times to the new location. You can see the results of all the parts coming together very quickly. It still needs some more interesting stuff though. I know.............maybe a punched out, raggedy hole.

Another job for the 2 rail sweep! 2 offset ovals and a cross section later, I have the underlying shape for my hole. I also drew raggedy outline of what the hole opening would look like. Clear the component inside the raggedy outline, and there you have it.
Now to identify what this panel might be. I came up with some text, and added a prism effect with the create shape tools. Now this piece of metal makes sense.The hole on the left still needed some work, so I used the sculpting tools to add some dents and such.
I think this panel is done. With being able to control every aspect of this design, including how all the components merge/subtract and add, as well as all of there individual heights, The freedom is endless.


No comments:
Post a Comment