Well at least the NHL rinks will get used for something this year! We were contacted to make 3 hockey related games for Molson Canadian breweries. We received what were considered to be "napkin sketches" of some simple games for some kind of promotional campaign. Not overly complicated, but they did require a little planning at the computer end before we could start jumping right in!
The first game up is "Molson Plinko". Basically the puck comes in at the top, bounces down a whole mess of pegs, and lands in a section at the bottom with the "prize". Woo-hoo!
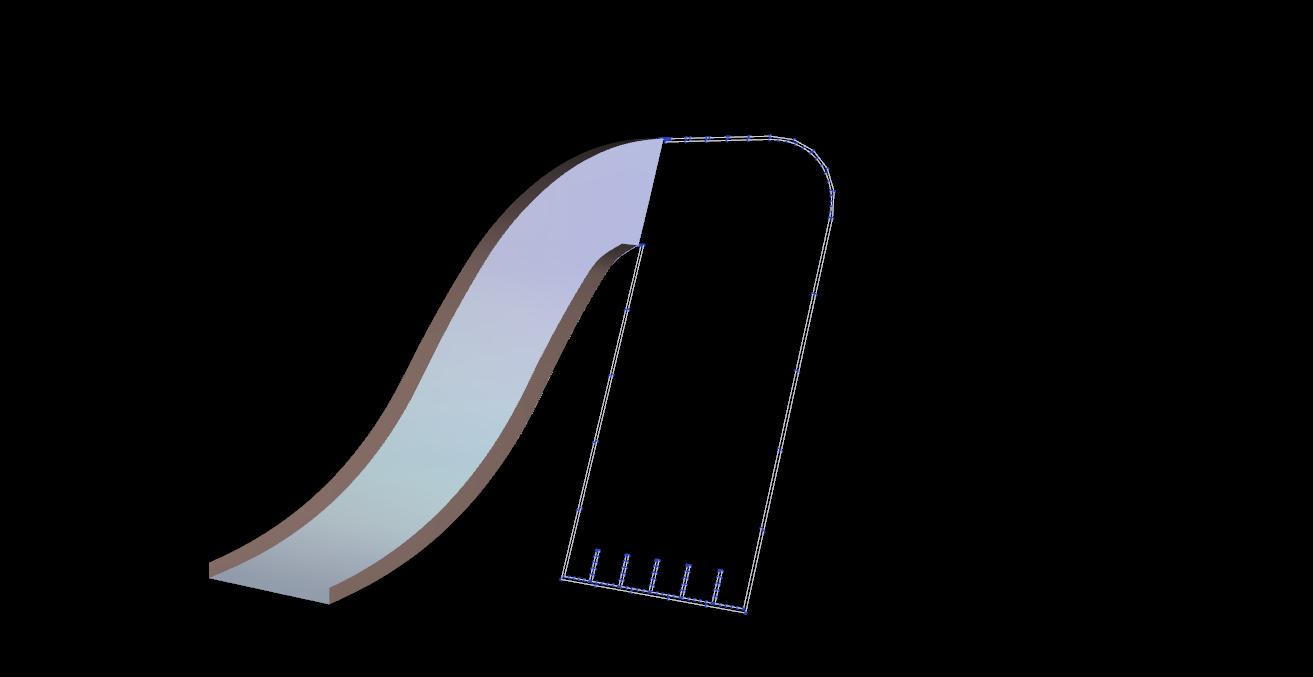
The first step was to layout the vectors full size, based on the very loose guidelines set by the napkin sketch. From this point, I exported them out to our 3d modelling software.
Once the vectors were imported, I was able to rotate them back to 80 degrees, which is the angle we all agreed upon.
The next step was draw up the ramp the puck needed to get to the top of the Plinko challenge. This is a pretty nasty ramp. The top of the game stands at 6 feet tall. Them's some steep games!
After I confirmed the ramp met the height and width it needed to be, I extracted the sides, and exported them out for unwrapping. The whole ramp will be made from 1/4" pvc on the slide, and 1/2" pvc for the sides.
This is the sides after being unwrapped, and adding the rabbet to slot onto the 1/4" slide portion. The rabbet was cut in around 3/8" to allow for #6 screws to pin the slide portion from underneath.
The art-work was supplied, and we had the great Autotrim in Lindsay print it out on pressure sensitive vinyl for us to install. I made things easy by rabbeting in a track for all the walls to sit into. This increased the gluing area for the pvc, as well as giving us a definitive border to trim the print to, once installed on the 1/2" pvc. All of these games get backed up with 3/4" plywood, for super-strength. The plywood also lets us hinge the fold-out legs, for easy set-up.
I also cut the acrylic cover that will mount onto the front of the game. This serves 2 purposes. One is to trap the puck in the game, and the second is to fasten the other end of the bolts of the pegs to.
Once it was all together, it looked great! Quite a challenge to get the puck up into, but good looking nonetheless!
With the ramp installed, it looks like it will be a lot of fun.
8)
JO


nice job Jamie.
ReplyDeleteyou make things look easy.
rob
How did you unwrap your 3d design to 2d for cutting?
ReplyDeleteAn essential hotspot for the gathering of spectators that makes the peruser walk by step.
ReplyDeletebest-air-hockey-tables